My Office

My Office
Inspiring Work Space

Monday, December 19, 2011

My Secret Recipe?

Where we started...
Kitchens are always the most difficult part of a remodel. When we started this project we weren't expecting a total gut job. We thought we were going to be able to use the cabinets, however, it didn't take long to realize that we were going to have to get rid of everything and start from scratch. As you can see in this photo, the washer and dryer were located in the kitchen and the refrigerator is "floating" on the opposite wall. I decided to relocate the fridge, but the washer and dryer had to remain in the kitchen, here's how it all went down...

"gut job"
When we started ripping out the kitchen, we found that there was an old water heater in the corner cabinet and the exhaust vent over the stove wasn't even connected. We found electrical wiring that was "hidden" in the soffits and we knew it had been the right decision to pull everything out and get a clear look at the skeleton of the kitchen.

Once we had everything out I decided that it was the best time to relocate the stove, fridge and add a dishwasher. The things that you can't see is all new plumbing and electrical in addition to the new window, the only thing that stayed in the room was the paneling, it just got painted.

There was a small closet in the hallway and, initially, I intended to move the washer and dryer to that closet and increase the size of the kitchen, however, after carefully thinking about storage needs in the house, it was obvious that the house needed all the storage space possible and since there wasn't anywhere to get more storage, the laundry was going to have to stay in the kitchen. The only way to make it take less space was to bring in a stackable unit.

I decided to go with all white appliances since the washer and dryer didn't come in stainless. Since the appliances were white, I went with dark wood cabinets and dark countertops to enhance the contrast. Because I was on a very tight budget to do this kitchen that I hadn't even planned to do, I used stock cabinets, laminate countertops and vinyl flooring. Not only was the budget small because of all of the other things we had to do, but also because our purpose for buying this house was to get a good deal and keep the costs low.

I bought appliances that were on clearance (last years models) and was able to get a higher quality appliances on my budget. Also, by buying white appliances I saved about 10-15% of the stainless prices, and they function exactly the same. I bought my kitchen sink at the Habitat for Humanity Re-Store for 1/3rd of the price it was at retail. By painting the paneling instead of ripping it all out, not only saved money, it also saved time.

The vinyl flooring that was in the kitchen was in good condition and was fairly new, and we intended to keep it, however, the construction we did took a toll on the floor and in the end, I decided to replace it. I opted for a vinyl tile for the cost and also because ceramic tile would have added nearly an inch of height difference between the floors in the adjoining areas.

After
Ultimately, function is the most important aspect to kitchen design and this kitchen is very functional for it's size. The main thing lacking was a pantry and there was just no where to put more storage space. Fortunately, my dad gave me an armoire he wasn't using anymore and it was the perfect solution to form and function! Some things just came together and worked out for good, and others were carefully planned, but in the end, I'm very happy with the outcome.


"Pantry"
And, absolutely none of it could have happened without my great family who were there so many days working so hard to make this project come together!

For me, this was a great recipe that came together in a very "tasty" way!


Wednesday, November 30, 2011

Master Bedroom

For those of you who have seen my previous houses, you'll recognize everything about this room, except for the room itself. The main reason we bought the house in SC was to move our furniture one last time, so this time I designed the house to go with the furniture we already had.

As we were preparing to move, I made mental room plans with the furnishings and spaces in mind and only moved the things that I knew I had a place for. We had a much larger home in Salt Lake, but we knew we had to downsize and keep only the things we truly loved.

We chose very soft cream paint and I love the soothing feel of the space. We replaced the interior doors with white six-panel doors with high-gloss white paint. I definitely recommend the high-gloss for trim, it is so much easier to wipe clean and it makes such a great statement against any color of wall.

I'm not sure I can say anything about this makeover that the photos can't tell...

Before


Before
Primer goes on


All Primered Up


New Closet Interior Before Floors Were Done

Monday, November 28, 2011

My Latest Project or "Ginny's House"

Have you ever seen the show "Sarah's House" on HGTV? She buys a house and then remodels it one room at a time to make it her own. Well, I love that show and have done a very mini (at least budget-wise) one of those projects of my own.

Perry and I decided that moving all of our things was getting pretty tiring and we needed to find a home-base and start traveling lighter. (we've had 13 addresses in just over 11 years) So we bought the house he'd grown up in and moved all of our things to South Carolina and moved to Vegas only what we could take in our cars and rented a furnished townhome.

We knew the house in SC was going to be a real project because it had been neglected for some time and had been vacant for several years. But we were not prepared for just how much it would take to make it our own. We have been so blessed with family and friends who have helped along the way, and other than having the floors redone, we haven't had to pay for any labor. (I told you it was a blessing!) Our budget was blown the second day when we realized we'd have to gut the entire kitchen and replace all of the windows immediately.

We've replaced all of the windows, interior and exterior doors, lighting, electrical sockets and switches, thermostats and plumbing. We had to gut the kitchen and replace all the appliances and have gutted a 1/2 bath and took a closet out of the full bath to create a shower, thus making the 1/2 a 3/4 bath!

Every room has been painted, ceilings, walls and trim and the carpet removed and hardwoods stripped and refinished. We also had to clear a jungle out of the yard just to get near the house and even replaced the mailbox! The punch list keeps getting shorter and shorter and is now less than one page on a steno pad. We started on October 9th and even though we are not completely done, it is fully functional now.

This is just the first round of changes to be done to the house, I, unlike Sarah Richardson, have a limited budget and limited time to put into the job and my family has spent so much of their time working, we all need a break, maybe we will start again next spring. In the meantime, I'll share with you some of my favorite projects so far.

Let me say that the best part of this entire endeavor has been doing the work (sometimes really nasty work) with my Mom & Dad, Aunt Pat and Uncle Ray, Lauren, Aunt Judy & Uncle Del, Margaret Dunn, Aunt Ma, Uncle Melvin, Charles, Robert, Woody & Josh, Tyler and, of course, Perry. Aunt Pat kept reminding me, when it felt overwhelming, that we were just making memories and boy did we! I can't walk in a single room in this house that I don't see all of them there!

Before

The outside before and after shots, shown here, are from last month. We took down the mismatched shutters and replaced them with all matching ones.

The closed in front porch will be coming off so we can have a rocking chair front porch like a true southern house. And in the spring we hope to do some beautiful and much needed landscaping!

During...
The weather has been so yucky, I don't have more updated photos, but stay tuned, more to come!


Wednesday, September 14, 2011

a little more "therapy"

Connie and I were so inspired by what a difference a day made to the dining room that we decided to do a little sprucing up in the great room too. I forgot to take before pictures, so you'll just have to use your imaginations.

With the dining room  looking so fresh and bright, it made the others look  worse than they actually did. So we decided that after church on Sunday, we'd check out a home decor store for some fresh accessories and we'd spend our last afternoon together re-arranging furniture and touching up paint.

We moved the living room sofa from the center of the room to the window wall, which opened up the large space dramatically. We took down the heavier curtains and opted to just use the shears. We added the throw pillows to the sofas, which made them feel like new and took out the rug that was showing too much wear. The biggest change was bringing in a colorful, fun clock for over the sofa where she had a collage of family photos. While family photo walls are great, the collection was a bit busy, by bringing in one large item, it made the space seem more restful.

On the other side of the great room is a seating area with a fireplace with built-in shelves on each side. The shelves were mostly empty except for a few books which we moved to the bookcase that was on the other wall. We decided to take out the shelves and use the niches for two large pieces of art. I removed some of the family photos from this area and we pared them down to the most recent of each family member and chose frames that were most alike.

Because the two areas of the great room are open to each other, we chose to use art that had the same look and feel as what was already in there. The spot lights in the niches highlight the paintings and make the space feel very elegant.

There are very few accessories and that creates a more calm space, where the senses aren't so stimulated. Again, this make-over was mostly with things she already owned. We only bought the art for the niches, the clock and the throw pillows. The entire thing took about six hours and that includes the shopping.


It was so satisfying sitting down that evening and looking at what we had accomplished, but nothing could compare with the smiles and laughter we had shared while we worked together. 

So, the lessons here are these: Updating your space and creating order to your home can change your outlook on the rest of the world; You can make a huge difference in the look at feel of your rooms for very little money just by looking at what you have more critically; And last but not least, making these changes with a friend make lasting and wonderful memories!

Tuesday, September 13, 2011

Re-decorating "Therapy"

So, any of you who have read my blog for a while, or who have worked with me, either as a client or co-worker, know that I truly believe that our environments profoundly impact our spirits. When our lives get crazy and chaotic, we can retreat to our calm and serene spaces and get rejuvenated. But, when our homes are also crazy and chaotic, then we have no respite from the stress. This is definitely the case for my friend, Connie.

Connie and I became friends our sophomore year in high school, but after high school, as happens so often, we went our separate ways and lost touch for twenty years. (How can that be when we are only 39? well, stranger things have happened.) Since our re-connection we have tried to get together as often as possible and have enjoyed traveling together and getting to know each other's families.

In the past few months, Connie and her family have had some pretty serious issues to deal with and their lives have been turned upside down. Their home life has been in complete disarray and their once warm, cozy and fun-filled home has taken on the image of the upheaval as well.

Their family has lived in this house for twenty-two years and they have remodeled and redecorated and expanded to make it fit their family's needs. Over the years this house has become the place where their best memories have happened, so when the troubles came, the memories became difficult to hold on to and the house began to lose it's warmth.

My family went through similar issues a few years ago, so I wanted to share with my friend and encourage her, so I took a trip to the mid-west to see what I could do to help. Now, I'm no professional counselor, and I've never played on on TV, but every woman knows that a little "retail therapy" can lift the spirits like nothing else! So, we decided to go shopping and there was a Danish Furniture store just down the street and that's where we started! (I know you are wondering if this shopping trip was about helping Connie, or all about ME!?)

Connie had mentioned that she wanted to get new furniture and that freshening up the house was something she'd been thinking about doing, so even though I'm not a professional counselor, I am a professional designer, so I knew I could help!

All we had to do was polish the floors!
She wanted a new bedroom suite and a new kitchen table and chairs, but the room that needed the most TLC was the dining room. It was the most un-used room in the house and we decided to change that.

The carpet had seen better days and we knew that there were hardwoods under there, so we decided to uncover them and see how bad they were... but, they weren't!

Once the carpet was up, we patched a few spots on the walls, touched up the paint and decided to move the kitchen table (which was in good shape, just needed new chairs) in and went back out to find chairs and a new light fixture.

Now, you're probably wondering where the therapy took place, well, it was in the tearing out the carpet, focusing on something other than what was bad, it is seeing a change in your surroundings and feeling fresh new starts. Sometimes doing something physical can give a sense of well-being, but when you are struggling emotionally, it's hard to be physical. Some of this was hard work, but the more we did, the better she seemed to feel.

The kitchen table was a light maple finish and Connie had the two chairs that were in the dining room, they were in good shape, but one had a little candle wax on the upholstery and the legs were a dark color. We decided we'd use them so we removed the wax from the fabric* and decided to find a way to make the dark and light finishes "work".

I found a great natural fiber settee that had both light and dark in the woven materials and shared the same dark colored legs as the chairs. We decided that we liked the fact that it wasn't the expected, so we bought it and brought it home. We also found a fantastic light fixture that was simple and elegant, but added a bit of "bling" and after just a few attempts, we got it all wired up and working! (never underestimate the power of two women on a concerted mission)

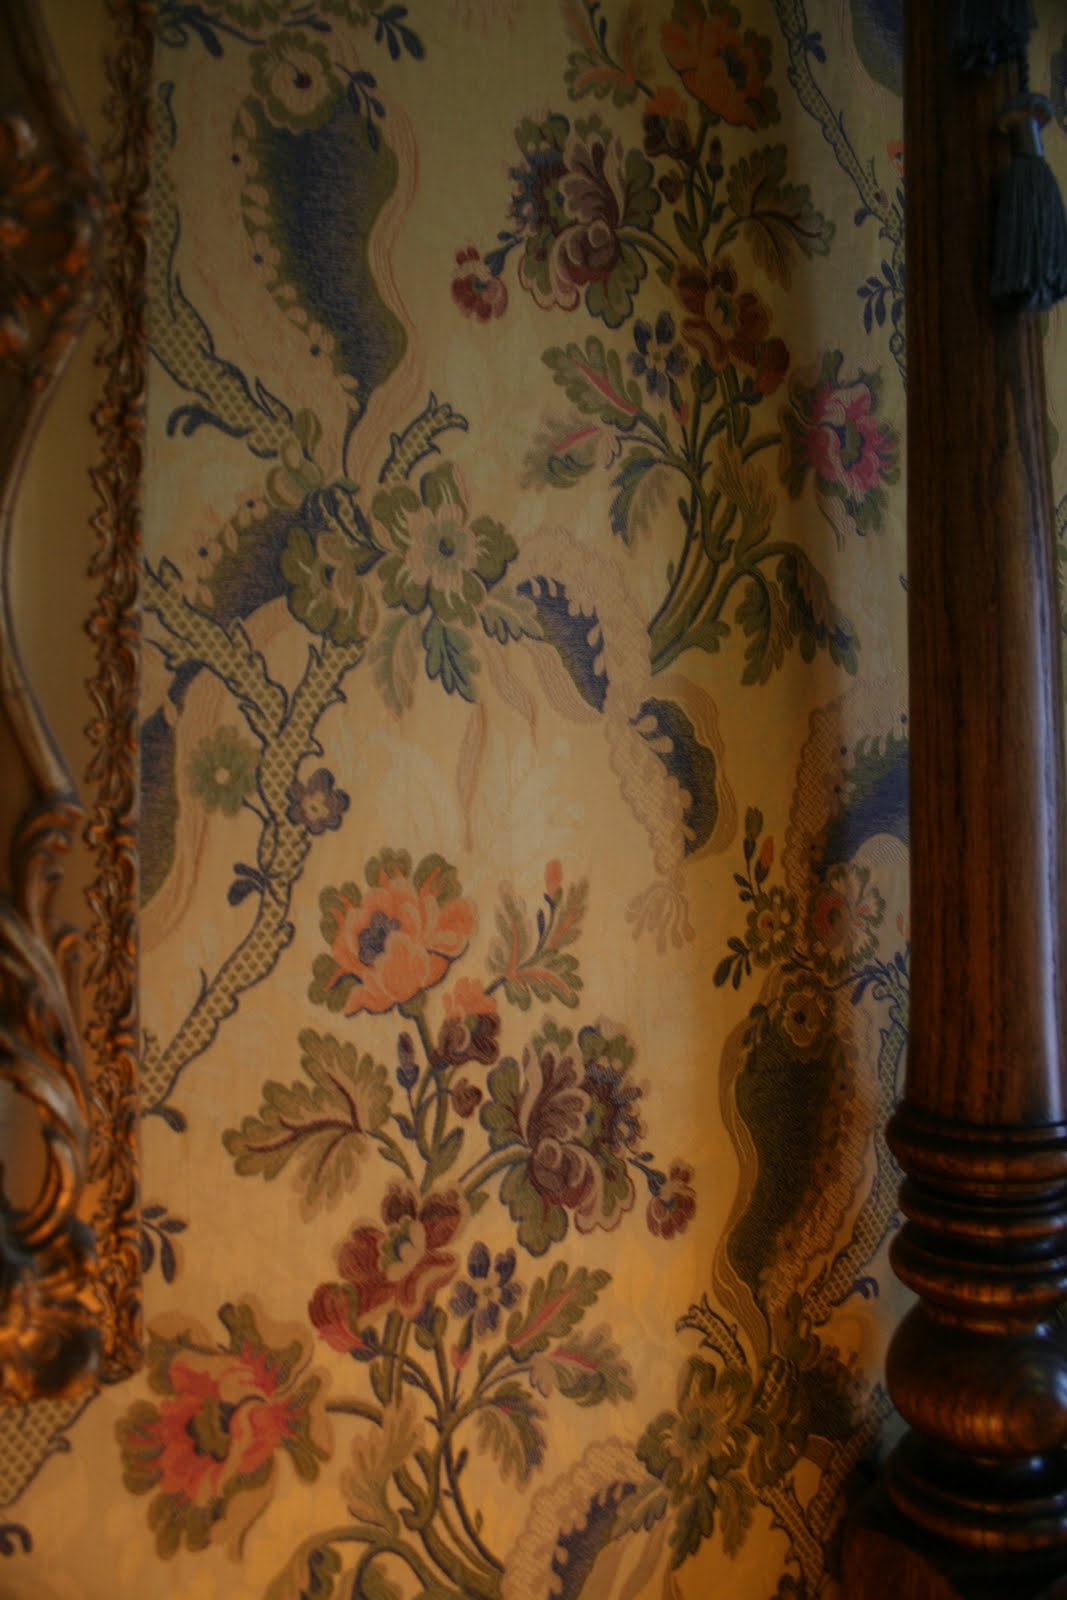
The curtains had already  been in the room, we just brought them back in, and the new light fixture repeated the circle pattern of the curtains. We added round placemats to continue the theme. We brought back in the mirror and sconces that were in there before, but centered them over the table, which we positioned center of the light fixture.

Before

After (almost)


The best part of this therapeutic make-over, is that everything except for the settee and pillows, light fixture and very few accessories were already in the house. And, it took us only twelve hours to complete! (including the shopping)
After
The room is bright and fresh, and for one day Connie was able to focus on something besides the pain she'd been feeling for so many weeks. We spent that night just sitting in the space, we had our coffee there the next morning and so many times since I left she has told me she's using the room.

No, the trials are not over, the situation isn't "fixed", but there's a new outlook and a place of calm and serenity where she can go and rejuvenate. Her devotion book is there on the table, and there are no bad memories to distract her from prayer and meditation. It's a place that she can now share new and wonderful memories with her family.  And as her friend, I can't help but be proud and honored to have been a part of that with her!


*My Aunt Pat taught me to get was out of fabric by laying a paper bag over the fabric and then using a warm iron, go lightly over the paper bag and the heat will melt the wax and the paper bag with absorb it. You might want to use a thin towel between the paper bag and your iron, but it works! Thanks Aunt Pat!

Tuesday, August 9, 2011

Love & Passion

In May, my husband and I went on a vacation to the Pacific northwest. We started in Seattle and drove the PCH (Pacific Coast Highway) all the way south to San Francisco! It was absolutely the best vacation we've ever taken, and mostly because of the beautiful Bed and Breakfasts we stayed in each night.

One, in particular, Abigail's Elegant Victoria Mansion in Eureka, California, stands out most in my mind. It wasn't just about the hospitality of the Innkeepers, it was the home they had created! It was like a "Night at the Museum". The furnishings and the decor was so perfectly done, you'd swear you'd gone back in time.

picture moldings/medallions
They have lived in the home for over twenty years and have spent all of that time restoring and recreating the High Victorian style; true to the period the house was built. They've put so much time, effort and finances into designing this house back to it's roots! Not a single detail has been left to chance nor ignored. The pictures all hang from beautiful cords and medallions from the picture moldings.

Upholstered Walls
 They have original lighting throughout the house  and the effect is stunning. They've even used beautiful imported tapestry fabrics to upholster the bedroom walls!
Original lighting

Tapestry fabric walls
Probably the most impressive thing, if there is just one, would be the use of wallpaper. They have had the most amazing and intricate wallpaper designs done on the walls and ceilings of the main floor. This would be so typical of the period and they are gorgeous.

Just to note, this wallpaper doesn't come in sheets, it is painstakingly cut from rolls, each little design, and applied in layers to create these beautiful patterns.

Peacock in the window
The draperies are also very detailed and layered. They not only dress the windows beautifully, they are used graciously between the rooms. In the Victorian era that would have been to keep smaller spaces warm, and in modern times with central heating, wouldn't be necessary. That's what I like about their design, they did it for the design's sake, not function.

You can see better (professional) photos on their website, but these I took in the wee hours of the morning as we were checking out of the B&B.

'chick'-a-dee in birdcage
One of the other things you might have noticed is that, even though they have taken their design seriously, they haven't taken the decor too seriously... check out the chicken in the bird cage! It's a stuffed chicken, a sort of "tongue-in-cheek" response to the beautiful taxidermy peacock in the front room window. I love it!
 
Drapery in doorway

Now, not everyone could live like this, I'd hate all of the dusting, but I can certainly appreciate the style for what it is and definitely enjoyed looking at the beautiful furnishings (most of which are antiques!) The lessons here, I think, are to design your interior according to the architecture or period of the home, and to be passionate about the things you bring into your space.

Doug and Lily love their home and consider themselves curators, not just innkeepers or homeowners. Their passions for the home and the Victorian period have made their home something so special, not only to them, but to all who are lucky enough to visit.


Monday, August 8, 2011

The Best Compliment:

I had a visit from a client yesterday. I started working with them in February and it was just going to be new floors, paint and a couple of pieces of new furniture. It turned out to be every room in the house got a makeover and almost all of the furnishings were replaced!

They ended up knocking down walls, adding built-ins in two rooms, replacing lighting, recovering furniture, making custom draperies and bedding and even refinishing the kitchen and hallway cabinets. They removed carpet from the stairs and put in wooden treads; I'm talking about a total overhaul!

Things didn't always go smoothly, we went through rounds of fabric selections only to find out that some of the key fabrics were discontinued, then back to the drawing board. We broke the budget on somethings and had to make concessions on others. It was trying on all of us , but they were living in a house where every single room was dismantled in some form or fashion! At one point there was not one room in the house that was fully functional. For weeks they had all of their furniture covered with plastic sheeting and even the kitchen had no cabinet doors or drawer fronts!

One day while I was at the house getting last minute sign-offs on fabrics and finishes, I had everything spread out on the dining room table (which we weren't replacing because it had sentimental value). He perched on the table while we were talking and the pedestal *snapped*! It was heartbreaking because I knew there was no money in the budget to replace it, and besides they WANTED to keep it! He was able to get it repaired, but can you imagine?

Somewhere along the way we became more than designer/client, we became friends. That's exactly why I wanted to do this job in the first place. I love people and I am happiest when they are excited about their homes/spaces!

The job is almost complete, the last of the furniture is going to be delivered soon (custom furniture takes so long to get here... something I never experienced being from NC) and their lives will go back to normal. The walls are all finished, the painters have finally all gone home and the dust has been cleaned out. Their beautiful draperies are all hung and the new floors are gleaming! What started out to be new floors and chairs for the living room took over their lives for over 1/2 a year.

One of the last thing he said to me at the end of our visit yesterday was that he appreciated the fact that when I suggested paint and he felt it was too dark and lightened it, I just designed around the change! Well, of course! Ultimately the client has to live in the space, so it's more important that they love and are comfortable in their home.

The sad fact is, however, that there are designers who put together a plan and expect the client to live with what they say, because they "are the professional and know better". I have to admit that there are times when I have known that something I suggested would look beautiful, and was a bit disappointed when a client has decided not to go with my suggestion. but, I'm  less disappointed when, in the end, they are happy with the outcome.

The best part of the experience for me is building the relationships and hopefully they feel the same way. When at the end of a 6-month long project, of not living in his home, but in a construction zone; and with all of the trials and frustrations that a remodel causes, comes to an end and what stands out is that his designer was flexible with paint color. I'm saying that was a successful remodel, and the best compliment I've ever been paid!

*stay tuned for photos to come!

Tuesday, August 2, 2011

Rugs!

I was contacted by justarearugs.com and asked to review their website and rugs and blog about what I found... well, I found a LOT of stuff!

from justarearugs.com
I was surprised at the selection. Great rug companies that I'm very familiar with like Surya, Capel, Colonial Mills and Trans Ocean (and more). I love that they have the option to search by brand, material, Country of origin, style, color and weave! It makes rug shopping so much easier than going from store to store or even website to website to find many different styles and brands.

I was so impressed with the page after page of customer reviews. They also have 30-day money-back guarantee, no restocking fees, pricematch and FREE SHIPPING in the US!

So... I can't give you a great story about their service from a personal point of view, but I can tell you that after visiting the website, I'll definitely be using this website to order rugs for myself and will be recommending it to all of my clients! For the selection and user friendly ease of the website combined with all of these other features... it's a no-brainer!

 Check them out... if you try them or have used them in the past, let me know... I love finding new resources and love passing them on to you!

Saturday, July 30, 2011

Wow! It's been a while!

Well, it's been ages since I've had time to post anything here. I have been working as a designer for the Thomasville ~ Drexel Heritage store in Murray, Utah and it's amazing how much time it takes to have a job and how little I have energy to do after being out of the house all day!

As of July 2nd, I decided to leave my full-time, commission-only job to work on my own. When I started this blog and decided to start my own business, I had no idea where life would take me and it's been a crazy ride for the past... nearly a year! (wow, time flies!)

So, armed with the knowledge I gained from working in a retail situation, I've begun a new chapter for Regeneration Interiors. I love the name "Regeneration" because it reminds me that there are always times when we need to "start again". So here I go!

I've got a few clients I'm working with, who decided to carry over with me from the store. I have always believed that Furniture Brands has the best quality furniture for the price, and I still do, so I will continue to work and sell through the store.

The biggest thing about being on my own is that, even though I'm still only getting paid when I sell, I'm not spending my time working for someone else. I have more control over the clients I work with, the jobs I do and my free time. So far, it's been more hours put in, but I can put them in whenever I choose... wow, freedom! Having said that... not that many people have walked in and asked for assistance, so that's a con.

One very exciting change to my new chapter is that I've now aligned myself with Furniture Brands Contract furnishings and I'm a "servicing dealer". That means that I can sell any of the Furniture Brands (Thomasville, Drexel-Heritage, Broyhill) to commercial clients. I'm so thankful for the contacts I have within Thomasville, after all of these years!

While I've done design in the past and have worked with clients on staging and re-design, I've never had been able to sell directly to the client, so this is quite a bit different, and I think I'm going to love it! I've contacted a few other furniture brands and also accessory lines and am setting up accounts everywhere I can in order to have the broadest selection for my clients... now if I just had some more clients!

In addition to this new pathway, I've been doing some research in building businesses and branding. My husband recently learned about Zappos.com and their brand story at a SHRM conference, so we decided to visit their headquarters and read a book written by their CEO Tony Hsieh. This probably seems like I'm getting way off track, but it will make sense, I promise. (I definitely recommend you check out their story and read "Delivering Happiness")

So what did that have to do with Regeneration Interiors, or me? Well, it made me think about who I am and who this company is and where are we headed. Since I don't have a great success story, YET!, I have to tell you who I plan to be and who I want to be, so here goes...

Most everyone who knows me and has read my blog for a while, understands my philosophy on design and decor, but you may not understand my philosophy on 1) customer service, 2) community responsibility and 3) charity.

The three sort of go hand-in-hand, but to clarify...

1) I believe that if I provide the best customer service I can, take care of my clients' needs and show them that their happiness is more important than the bottom line, then the money will come, because ultimately people want to know that they are the priority. (by the way, this is exactly what I told the folks at the store when I was interviewed!)

2) I believe that we as individuals have a responsibility to be active and responsible members in our community, the same goes for businesses and sometimes that means doing something good for the community, even when it doesn't make you any money. That being said, I'm now looking for a shelter charity to work with where I can take my talents and assets to help others. My dream would be to provide furniture for a needy family. (let me know if you know of a local group who might benefit from this sort of service.) I'm committing to doing (for now) two projects per year, not necessarily with the same organization.

3) Last, but not least is charity, and there are so many, but for personal reasons, we've decided that 3% of all sales will go to the American Cancer Society. We've had several family members who have been taken from us by this terrible disease, and we want to do everything we can to aid in research and to assist those who are currently suffering.

Now that you know where I am, and where I'm headed, I hope you will become a follower of my blog, call me if you need help with a design or decorating project, and pass my name along to anyone you know who might use my services. I hope to be back on track with my regular blogs and see and hear more about what you all have going on!

Tuesday, April 5, 2011

A "Diamond in the Rough"

My friend Derya and I found this great little consignment shop called "Chic & Unique" here in the SLC. We have been there quite a few times and have brought home some pretty good finds! I already posted a picture of my coffee table I got there for $50 and which I LOVE! but, probably the best one is a cabinet that I got there for just $200 and it looked rough!

I went in the store every week for over a month drooling over the cabinet, the price went from $425 down, down, every week and I kept waiting until I moved in my house because I had no place for it, and was so afraid it would be gone before I could get it! I don't really know why but it just begged me to take it home.

before

the front of the drop leaf

One lady in the shop told me that she intended to paint it and I was heartbroken, really worried they'd paint it before I could get it. I'd talked about it so much that my husband finally agreed to go look at it with me. He, too, liked it and thought it had potential. So he agreed I could buy it and we were finally moving into a house and I knew just the place for it!

this gray stuff was all over it
The drop-leaf door was locked when the consignment shop got it at an estate sale, and so they drilled it out to open it, what you see above is the "patch job" they did on the hole (the reason they thought it needed painting). The gray matter that was all over it looked like someone had spilled paint and then wiped it with a dirty rag and just smeared it down the face and side of the cabinet. You can see in the shelf how it was sort of hazy. It all wiped off with just water on a sponge!

I was sure the folks in the shop had tried to get it off and failed, but apparently they hadn't even attempted it, because it was very simple to get off. I was thrilled!

Inside the cabinet was an old light with huge bulbs and the wiring looked a little sketchy to me, so I bought a strip light with LED bulbs to replace it. I also had two glass shelves cut to replace the big wooden one which obviously was not original to the cabinet. I put it in the corner of my living room and filled it with my wine glasses and other barware and VOILA!

The "gray matter" washed right off!


I LOVE the outcome!
I love the way it turned out! It is a great storage piece, plus display!  This is just proof that you can find great things at great prices if you are willing to gamble on a diamond in the rough!
it's not perfect, but it stays open all the time anyway


Monday, April 4, 2011

Rules NOT To Be Broken

The more I do this job, the more I realize there are a few rules that should never be broken when designing your space!

1) Always pick your fabrics before you choose your paint color! There are only limited colors and patterns in fabrics, but paint can be made in any shade!

2) Always plan your space before purchasing the largest piece of furniture! You can always go back and buy that piece after you've measured your space, but you can't always take it back when it doesn't quite fit! AND... you have to think about how the other furnishings in your room will work with that 10 foot long sectional!

3) Always know what style you are before you purchase! If you purchase something because it looks great in the showroom and it's not at all the style you are or want to be, then you are stuck with a random piece, or changing the style of the whole room to accommodate that one object!

4) Always use scale and proportion in every piece you buy! There is nothing wrong with having a huge wall unit, or a large sofa, as long as everything in the room follows the same scale... but having one large piece and then lots of little pieces just looks odd.

5) Always decide on your budget for the room before you start AND stick to it! Most people think of a budget as the starting point, but it needs to be the ending point. If you have a budget of $5000 for the room, you can't pull it off if you spend $2500 on that gorgeous sofa and you don't have tables, other seating, window treatments, accessories, etc... Planning is key!

6) Always get the advice or collaboration of a professional when you just aren't sure what you want or where to start! Most furniture stores offer free design advice when you purchase your furniture through them. You don't have to take their advice and you don't have to purchase more just because they suggest it, but it is amazing how much better the space can look with just a few tips from a professional! And you don't lose creative control, sometimes it just helps to have someone to keep you on track!

7) Always complete the room before you purchase the "extras"! That means, when you are doing your space, do the finishes first, i.e. walls, flooring, lighting, draperies... If you purchase that great sofa and tables and beautiful lamps and art, but you still have the ugly light that you don't like, then the room isn't going to be "done". You can always purchase the accessories, art, throw pillows later on, get that light or put down that carpet, then you will feel better in the space.

8) Always buy big ticket items first, then get the accessories, you can also save a lot of money on those things because they don't have to be functional, and you can change them easily for a new look, so spending a lot of money on small things can be a waste!

I hope you haven't already started and made these mistakes! And, if you are getting ready to start a big project, or small one... I'd be happy to give some tips and pointers on how to make your designing go smoothly!

Enjoy!

Monday, February 28, 2011

a "quick" update

we have leased a wonderful house in the Upper Avenues of Salt Lake City and we are enjoying it so much. you can probably tell by this picture that the view is one of the best features of the house! 

I will post much more about the house and more photos, but I wanted you all to see the only room that is completely decorated and looks pretty darn good I think! 

I have had the sofa for a while, I got it from Thomasville, but the chairs are from Ikea and the table is from a consignment store (and I paid $50 for it!) I love the way it all comes together. 

as I said before, I wanted the room to be warm and inviting, but I didn't want it to compete with the view and I think it is all of those things! I do not plan to add window treatments, unless the sun gets so hot we can't be in there... it has already fried the plant you see there, I had to move it!

I will try to post more photos and ideas this week... there is just sooooo much going on!

p.s. Derya's house is looking great too, we both moved in to our new places the same day!


Sunday, January 30, 2011

Fun Fun Days


My friend Derya and her husband Soner, have just bought an old home in downtown that was being restored and and they got to pick the final details! I'm so jealous because I'd love to be renovating a charming old home! Anyway, my jealousy is abated with the fact that I get to help her do her house and will get to sit back and enjoy it with her in the end! (the best part of being a designer!)

We have been shopping for lighting, cabinet knobs, window treatments and furniture! The house was built in the early 1900s and is an Arts and Crafts Bungalow, it's being restored very carefully because it's on the National Historical Registry. Derya's style is very eclectic and funky and this house is going to be AWESOME!
Derya on one of our shopping trips!

With all of the finishes and fixtures she  chose very carefully to fit the style and period of the home, but with the furnishings we are hitting all of the vintage shops and thrift stores and finding fun, wonderful pieces to make the house look like she does... fun, young, hip and did I say fun!?

(Sidenote) We found some wonderful chairs online and couldn't find a place to get them in the U.S.; then when we did find a place it was in Boston and the chair was $900, plus tax and shipping... a little out of budget for a single chair... and it's plastic! Let me introduce you all to "Pasha" chair by Pedrali... I think you'll love him as much as we do! Derya has discovered "chairgasm"!


Being from Turkey and loving an Eastern style, we tried to find things that went with the period and style of the house, and also brought in that Middle Eastern flair. We found hand painted knobs for the kitchen and paired them with oil rubbed bronze pulls. We found mercury glass, Moroccan styled pendant lights for the dining room and a table that was made from an old door from India! And interestingly enough... they all look right at home together and with the other more traditional details of a 100 year old house!

They move in to their house on Monday (same day Perry and I move to our new house) and then I'll share photos... for now, check out some of the things we found while shopping!  Then, once they're all settled in, I'll post photos of how it all turned out!

So, the title of this post is "Fun Fun Days", and that is what we've had shopping and selecting everything for the house, but those days are not over, we will have many more enjoying the spaces we had so much fun creating together!
We opted for a pair of these over the DR table

Great sofa, huh?!


Very similar table, no two are alike!

on lower cabinets and drawers

On upper cabinet doors! 

Wednesday, January 26, 2011

I love these chairs!

So, you all know that I love Mid-Century Modern and you know I love Ray and Charles Eames... but I'm suffering from such a strong infatuation with the "Shell Chair" that I see them everywhere and I even dream about them!

There are several cream colored ones at The Green Ant; the great shop across the block from my condo and I want them so badly I've even told Perry I'd not eat for a month to have them! (bonus to this scenario... I lose weight!)

Now, my friend Derya wonders why I'd pay so much for vintage, original ones, rather than purchase new ones, because they are still in production... it's the fiberglass! ...Eames chairs have been widely imitated, but originals are highly sought-after by collectors because they are considered breakthroughs in both design and technology...


from Apartment Therapy

from Apartment Therapy

from Apartment Therapy
And when I say I'm seeing them everywhere, it's not just in the vintage stores I visit... they seem to be in every blog I read, and every website I hit on... I found these shots on Apartment Therapy and I want to share them with you all! This article is actually about the coffee tables, but what room wouldn't be better with a great shell chair... (I'm sure you can determine which ones are the shell chairs in the shot, right?! hehe)


My "inspiration shot" from some can't-recall website (sorry)
If you are on my facebook, you know I've found an "inspiration shot" for my new living room... And you know that my color scheme is monochromatic in creams and whites, so just how perfect would these wonderful cream colored shell chairs with a chrome eiffel tower base be?! Well, I have a way of deciding the value of a purchase and that is this... "do I love it __(?)___  many dollars worth?" and the answer for this one is..... YES!!!!! 
so, on the new living room idea... I have a similar sofa to this one, but it has a little more gray undertones... in place of the two painted side chairs, I want to put the Eames shell chairs... the layout would be more like the photo above with the blue ones and my chairs would have that type of base... weigh in folks, let me know what you think! Seriously!

Monday, January 17, 2011

Found "treasures"

part of an old light fixture
OK, so I love when I find something unusual and it turns out to be something that I love! I was in the Habitat for Humanity ReStore last week and found this great frame from an old lighting fixture for just $3. The globe was broken so I just opted to take the ring and not the fixture part, but my idea was to make it a mirror frame. I had seen some little round mirrors at Tai Pan Trading in Sandy, UT, but when I went back to get the mirror I was sure would fit... it didn't!

I'm glad it didn't because I like it better for what I found while exploring... I like the idea of multi-functional items so I got a few different options. Now, the best idea we (Derya & I) had there was to take photos of each option in the store, then we could choose which one we like best!

a terra cotta pot - $16.99

A clear glass vase - $12.99

Clear candle plate - $.98

Dessert plate - $.97
I love the way it looks with the terra cotta pot, it makes a great base and elevates the pot just a bit! There are so many different pots, urns and vases that are somewhat rustic and the frame gives it an elegant feel.

The simple clear candle plate was so inexpensive, but with the frame... terrific! This could hold up to an eight inch candle or several candles clustered, where can you get a great candle holder for just four bucks? No where!

Next, for about the same price as the candle plate is the small dessert plate.. and how cute would this be with a cute little cake or cookies at a party? There were also some great domed covers that would add a lovely touch to this pairing. The best part is that it's not an old light fixture anymore, it's a great cake stand/dessert tray!

Now, my favorite and the one I have now sitting on my kitchen counter is the glass vase! I love the simple cylinder and the frame is just like icing on a cake! I have it now with candles in it, but I will fill it with Christmas ornaments, decorative orbs, vase fillers and a candle and, of course, flowers!

So, let's say this is not exactly your style? This would also be great painted white or off white and sanded off a bit on the edges for a great shabby chic look, or paint it black for a dramatic look in more contemporary settings.

This one is made of cast iron (antique I think), and it's very heavy, but newer lights are made of brushed nickel or other materials that might work with your decor... keep your eyes open and if you find another idea to do with old light fixture parts... please share! I'm excited and inspired and will definitely be looking for more old lights and making more cool accessories with them!